Design Thinking • Windmill

Product design blends creativity, innovation, and problem-solving to shape the products that enrich our daily lives. Whether you’re a developer, product manager, or project manager, unlocking your full potential and creating exceptional products hinges on understanding the product design process.

In this guide, we will delve into the fascinating world of product design, exploring what it is, how to design a product, and the cost associated with this process.

What is Product Design?

Product design is a dynamic process that brings an idea to life, creating items that offer significant value to their users. At its core, successful product design revolves around empathising with consumers, understanding their needs, desires, and pain points, and then crafting innovative solutions to address those challenges.

How to Design a Product?

Designing a product requires a systematic approach that enables teams to create innovative and successful products. This process acts as a roadmap, guiding product development from inception to production. 

While the approach can be tailored to specific projects, the following key stages are generally involved in designing a product:

1. Design Product Vision

Before you start building a product, you must understand why you are creating it. Every design project needs a clear product vision that outlines the long-term goal of your product and your reasons for creating it. This tool will guide the development team and help them create an effective product strategy.

Suggested reading:

For more advice on creating a compelling product vision statement, check out our blog How to Develop a Product Vision

2. Product Research 

Research is a critical step in the product design process. Conduct in-depth research to identify pain points, market trends, and potential gaps your product can address. Organise interactive brainstorming sessions to generate creative ideas that align with customer needs.

3. Ideation

Transforming ideas into tangible concepts is the next step. You can use sketches, 3D models, and storyboards to visualise and refine the product’s features and functionality. This stage enables you to explore different design possibilities and evaluate their feasibility.

4. Prototyping

Creating prototypes allows designers to test the product’s performance and usability before building the full solution. This is a crucial stage of the product development process as it allows designers to gather valuable feedback and make informed design decisions. 

The prototyping stage should focus on continuous refinement to ensure the product is efficient and optimised for users.

5. Testing and Validation

The testing and validation stage allows the design team to check that the concept works as intended. User testing and feedback are critical to ensuring the product meets user expectations and addresses their needs effectively.

6. Design Refinement

Based on the feedback received during testing and validation, designers make necessary adjustments to optimise the product’s performance and usability. This approach ensures that the final product is aligned with customer needs, thereby increasing the likelihood of a successful product launch. 

7. Manufacturing and Production

Once the design is finalised and thoroughly tested, it transitions into the development and manufacturing stage where it is mass-produced for commercial distribution.

Suggested reading:

Check out Design Process: Your Complete Guide for more information on the stages involved and hands-on tips.

Why do Designers Analyse Existing Products?

Analysing existing products is an essential step in the design process. By studying products already in the market, designers can:

  • Identifying market gaps:
    Understanding the strengths and weaknesses of existing products helps identify opportunities for innovation and potential gaps in the market.
  • Avoid common pitfalls:
    Analysing product failures and customer complaints helps designers avoid making similar mistakes in their own designs, leading to improved product performance.
  • Benchmarking competitors:
    Comparing competitors’ products helps designers gain a comprehensive understanding of industry standards, pricing strategies, and consumer preferences. This allows them to create products that stand out in the competitive landscape.
  • Gathering inspiration:
    Studying successful products can spark creativity and provide ideas for new design concepts and features.

How Much Does It Cost to Design a Product?

The cost of product design can vary widely depending on the complexity and scope of the project. Factors influencing the cost include:

  • Research:
    Extensive research and concept development is likely to increase the initial costs.
  • Prototyping:
    Creating realistic prototypes for testing and validation incurs additional expenses.
  • Iterations:
    Multiple design iterations and refinements contribute to overall costs.
  • Materials:
    The choice of materials and manufacturing processes impacts the final cost.
  • Expertise:
    Hiring experienced product designers or design firms will increase the cost.

Final Thoughts 

Product design is a complex process that involves creativity, problem-solving, and a deep understanding of user needs. The key thing to bear in mind throughout this process is that design serves people. The ultimate goal of any design project should be to create a product that offers the right features and a seamless user experience tailored to the intended audience.   
In the world of design, whether it’s graphic design, web design, or product design, a design brief plays a crucial role in ensuring the success of a project. By providing valuable guidance, it ensures that the entire team shares a common understanding of the project’s objectives, goals, and requirements.

In this article, we’ll explore the importance of a design brief and provide a step-by-step guide on how to create the perfect brief for your next project. We will also include examples to illustrate the key components of a well-crafted design brief.

What is a design brief? 

A design brief is a document that lays out the objectives, goals, and expectations of a design project. It serves as a roadmap for designers, helping them understand the client’s vision and ensuring that everyone is on the same page right from the start.

Suggested reading: How to Develop a Product Vision

Design brief example 

Looking at design brief examples can spark creativity and help designers come up with innovative ideas and approaches. These examples provide valuable guidance on best practices and give you a visual representation of what a well-structured brief should look like.

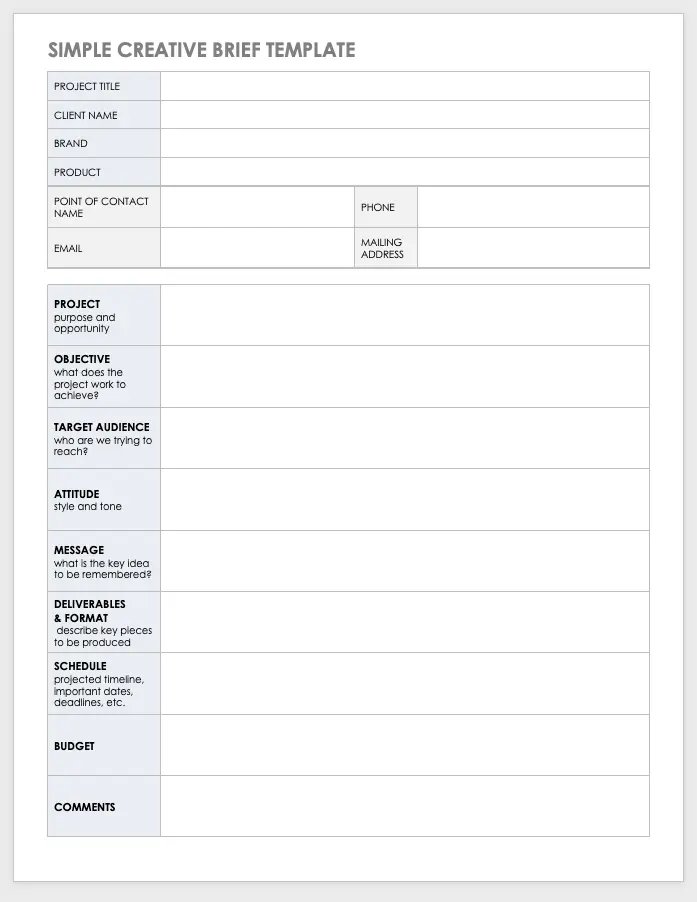
Here is an example of a simple design brief template that you can use to craft your very own design brief:

Simple-creative-brief-template
Download Simple Design Brief Template
Excel | Word

This versatile design brief template is perfect for a wide range of design projects, be it graphic design, web design, or product design. With its user-friendly format, it simplifies the process of gathering information and ensures that all essential information is brought together in one convenient location. 

Should I customize a design brief template?

When it comes to design projects, using a design brief template is a fantastic way for designers to collaborate and gather all the necessary information in one convenient place.

However, customizing the template to fit the unique requirements of different projects can bring even more benefits. By adding your personal touch and adapting the template creatively, you can effectively address specific challenges and goals, ultimately boosting the outcome and client satisfaction.

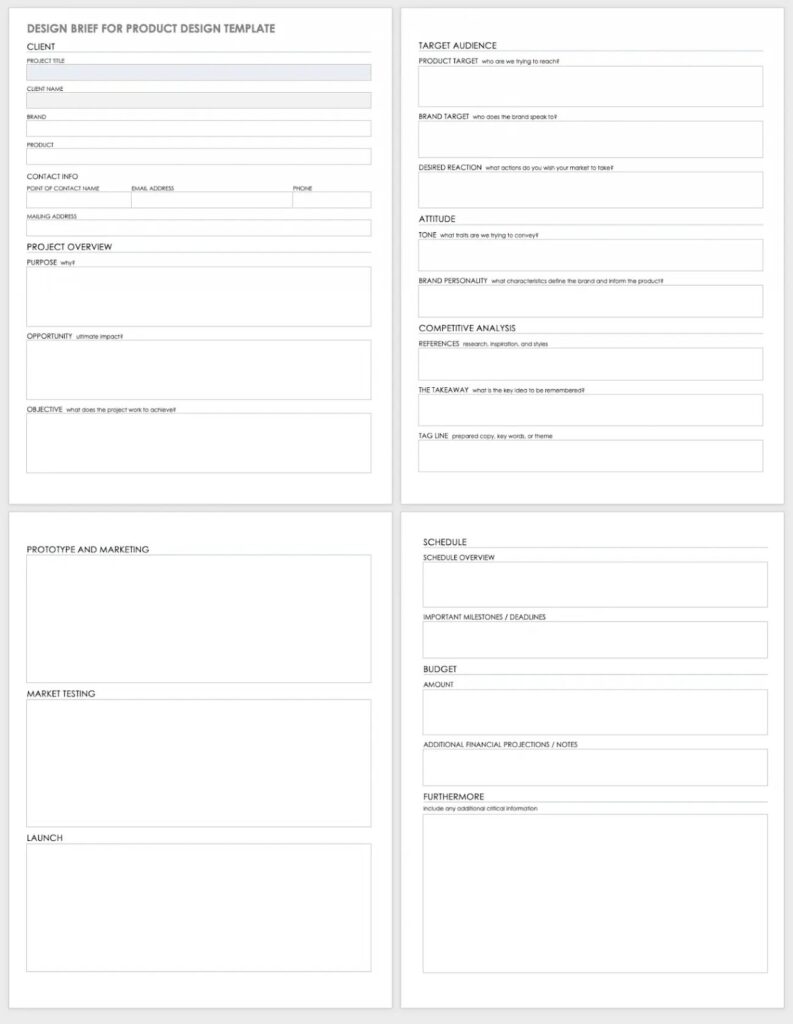
Let’s take a look at an example: a design brief template specifically designed for a product design project. 

Download Design Brief for Product Design
Word | Google Docs

This template is tailor-made for product design, focusing on how the product can provide meaningful and relevant experiences for its users. 

Why is a good design brief so important? 

A good design brief is incredibly important for several reasons, this includes:

  • Clear communication: A brief improves design communication and ensures that everyone understands the project’s requirements and goals. This minimises the potential for miscommunication and costly revisions.
  • Aligning expectations: A design brief helps align the expectations of the client and the designer and outlines the scope of the project, deliverables, and timelines. This ensures that everyone is on the same page from the get-go.
  • Efficient workflow: A good design brief gives designers a clear roadmap to follow, allowing them to focus their efforts on meeting the client’s specific needs. This helps to streamline the entire design process and improve efficiency. 
  • Client satisfaction: Ultimately, a good design brief leads to client satisfaction as designers are more likely to deliver designs that meet or exceed expectations. 

In summary, a well-crafted design brief acts as a cornerstone for successful design projects. It facilitates clear communication, aligns expectations, promotes efficiency, and paves the path to client satisfaction. 

What are the key components of a design brief?

A good design brief will typically include the following key components:

  • Project overview: The nature of the design work required, the context in which it will be used, and any specific challenges or constraints.
  • Objectives and goals: What you hope to achieve through the design.
  • Target audience: The target audience or user group for the design, including details about their demographics, preferences, and needs. 
  • Competition and market analysis: Key competitors in the market landscape. 
  • Brand guidelines: This should include the brand logo, color palette, and any other specific visual elements that need to be incorporated into the design.
  • Deliverables and timeline: The deliverables expected from the designer and the timeline for the project. 

How to write a design brief in 5 easy steps

Creating a well-written design brief requires careful planning and attention to detail. Here are five essential steps in writing an effective design brief: 

Step 1: Gather project information

Before you start writing the design brief, gather as much information as possible about the project, including objectives, goals, and constraints. 

Conduct interviews with stakeholders, review existing materials, and analyze the market and competition. The more information you have, the better you can define the project’s requirements.

Step 2: Define your target audience

To create a design that resonates with your user, it’s crucial to gain a deep understanding of your target audience. Conduct in-depth research to uncover valuable insights about their demographics, preferences, and needs. 

By truly understanding your audience, you can tailor the design to effectively communicate with them, capturing their attention and engaging them in a meaningful way.

Suggested reading: How to Find Your Target Audience

Step 3: Outline project scope and deliverables

Clearly define the scope of the project and specify what is included and what is not. Establishing clear boundaries will help prevent scope creep and ensure that the project stays focused and meets client expectations. 

According to a study by the Project Management Institute, nearly 50% of projects experience scope creep, and only 57% finish within budget while only 51% are finished on schedule. A well-crafted design brief can help your design team avoid these common pitfalls. 

Step 4: Establish objectives and constraints

Set clear project objectives and goals. Define measurable outcomes and identify any constraints or limitations, such as budget, timeline, or technical requirements.

TIP:  When defining the timeline and budget, it’s important to ensure they are realistic and mutually agreed upon. This will help to prevent any future conflicts and ensure that the project runs smoothly. 

Step 5: Structure and format the design brief

Finally, organize the design brief in a clear and concise format. Use headings, bullet points, and visuals to make it easily readable. Include relevant brand guidelines and examples to support the information.

Tips for creating the perfect design brief 

  • Keep your brief short and concise: Designing something already takes a significant amount of time, so no one should have to spend hours trying to understand a poorly formatted design brief. Make sure that your design brief is well-structured, visually appealing, and easy to read.
  • Make it interactive: Creating an interactive design brief can enhance the overall experience for both designers and clients. Use media like graphs, images, and interactive features to provide a visual representation of ideas and capture the attention of the reader.
  • Collaborate with stakeholders: Involve all relevant stakeholders in the design brief creation process. This could include the client, marketing team, and product managers. Encourage open communication and gather valuable insights from different perspectives.
  • Include brand guidelines: If applicable, provide brand guidelines, including the brand logo, color palette, and any other specific visual elements that need to be incorporated into the design. This will help the designer better understand the visual direction and ensure consistency with your brand’s identity.
  • Review and revise: Go through the design brief and give it a thorough review to make sure it’s clear, complete, and accurate. Check that you’ve included all the key information and that it matches the project requirements. Make any necessary edits or changes to improve the design brief before it is finalized. 
  • Ask for feedback: Share the design brief with the client or stakeholders and ask for their feedback. Take their input into account and see if they have any suggestions or if they need any clarifications. Once everyone is happy, get their final approval before moving on to the design phase.

Final thoughts 

A well-written design brief is a powerful tool that sets the foundation for a successful design project. It ensures clear communication, aligns expectations, improves efficiency, and ultimately, leads to higher client satisfaction. 

By following the steps outlined in this article, you can create an effective design brief that will guide the entire design process. So, invest time and effort into creating a detailed design brief, and watch as it becomes an invaluable tool in your design process.

Impact mapping is a relatively new technique that has gained popularity recently as more businesses look for ways to improve their product planning process. 

It provides a visual representation of various stages of a product strategy and measures the impact of any changes on the business. This helps to align development teams on goals with the desired impact on their stakeholders.

What is impact mapping? 

Impact mapping is a collaborative planning tool that improves alignment between development teams and stakeholders. It helps teams uncover the areas that will have the biggest impact and help them achieve a particular goal or objective.

The impact mapping method was first developed by Gojko Adzic, a well-known agile author and strategist who wrote a book of the same name in 2012. The concept is based on outcome-driven planning, user interaction design, and traditional mind mapping.

What are the benefits? 

Impact mapping offers several benefits, including: 

  • Better alignment between leadership and development teams
  • More clarity around the product strategy, outcomes, and goals
  • Less chance of project scope creep
  • Easier to identify and avoid potential bottlenecks 
  • Better understanding of how deliverables connect to user needs
  • Improved communication and collaboration between teams 

When is impact mapping used? 

  • To create a roadmap for product development 
  • To set project or personal goals 
  • To create a product vision 
  • To define the project scope
  • To reframe a problem 

How to get started with impact mapping? 

Gojko defined impact mapping as a 4-level process and introduced the idea of answering one specific question with every stage of product development:

  • WHY
  • WHO
  • HOW
  • WHAT

1. Why are we doing this? 

The first step of impact mapping is to define the goal or objective you’re hoping to achieve in the next phase of your product’s development. 

The goal should be SMART (Specific, Measurable, Attainable, Relevant and Time-based.)

Example: Your goal is to increase user conversion by 30% by the end of the year. 

2. Who will help us? 

You then need to determine who will help you achieve this goal — Gojko refers to these people as “actors.” Ask yourself: 

  • Who can produce the desired effect?
  • Who can prevent it?
  • Who are the consumers or users of our product?
  • Who will be impacted by it?

Example: The actors who will help you achieve your goal may include the marketing department, existing users, new users, or customer support. 

3. How will they help us? 

Now you should consider how these actors will help you achieve your goal or objective. You should consider the following: 

  • How should your actors’ behaviours change?
  • How can they help you to achieve the goal?
  • How can they prevent you from succeeding?

Example: You actors could make an impact by creating a personalised user experience, optimising layouts on critical pages, or improving user assistance. 

4. What will we do? 

Finally, you should consider: 

  • What can you do, as a team, to encourage this desired behaviour? 

Example: Introduce a live chat feature, maximise personalisation investments, or run workshops with your customer support team to align on company values, mission, and culture.

In this stage, you should write down as many actions as possible that will help you achieve the outcomes identified in stage 3. You then need to prioritise these actions based on how much value they will deliver to your company. 

Tap into the power of impact mapping!  

Impact mapping is a powerful tool that helps teams simplify complex product planning and improve their overall product strategy. You can use the impact mapping technique to prioritise new features based on your company’s goals and boost team collaboration. 

Most product design projects start with desk research — also called secondary research. This type of market research involves collecting data from existing resources, making it the opposite of primary research where you go out and study things first-hand.   

But what is desk research? When is it needed, and how do you do it?  

This blog will answer these questions and explore how desk research will lead you towards user testing and continuous research throughout the product development process. 

Why is conducting research important? 

Before you decide to launch or design a product, you should get answers to several questions such as:

  • What is the current market situation? 
  • Does the market need this product? 
  • Who are your potential customers? What are their needs and pain points? 
  • What problems can you solve that competitors cannot? 
  • What do customers like/dislike about your product? 

Product research helps you make well-informed product development decisions, identify potential issues, and gain insight into your customer’s needs and desires. This will enable you to build a well-structured strategy and develop products that your customers will love. 

The consequences of poor market research 

In 1985, Coca-Cola updated its classic coca-cola drink with a new formula. The company had performed 190,000 blind taste tests on consumers and discovered that they preferred the sweeter flavour of its rival Pepsi — so the ‘New Coke’ was launched. 

The problem was that Coca-Cola had underestimated loyal drinkers’ emotional attachments to the brand. Its market research testers failed to ask subjects how they would feel if the new formula replaced the old one. 

The new formula caused outrage among loyal customers and executives were forced to bring back Coca-Cola’s original flavour just 79 days after their initial announcement. This was a costly mistake that lost the company millions in revenue. 

What does desk research involve?

As mentioned, desk research is a research method that involves using existing data. This technique allows you to gather ideas and research your market and users “from your desk.” 

You can collect this type of secondary research from published materials in reports, articles, or similar documents that are easily accessible on the web or in public libraries.

Why is it essential? 

  • Secondary data sources are easy to find 
  • This research method is cheaper than primary research 
  • This research method takes much less time than primary research 

How to do desk research in 5 steps 

Step 1: Define your research objective 

The first step is to describe what you intend to accomplish with your research project. You can identify this by answering key questions that are relevant to your market and customers. 

For example, if you are a French baker and want to create bread with alternative flour, your questions should break down every question within that process, such as: 

  • What alternative flours are available in France? 
  • Which of these flours are affordable? 
  • Among the remaining choices, which flours are easy to use? 
  • Among the remaining choices, which flours taste good? 
  • What alternative flours are currently used by bakers in France? 
  • Who are you selling this new bread to?

Step 2: Build a research plan 

You then need to decide how you will complete this research and answer the questions you have set. As part of your research plan, you’ll need to decide which platforms you will use for your research.

Some popular resources include: 

  • Government, non-government agencies, and trade body statistics 
  • Company reports and research 
  • Competitor research 
  • Public library collections 
  • Textbooks and research journals 
  • Media stories in newspapers 
  • Online journals and research sites 
  • ChatGPT

3 tips for conducting desk research: 

  1. Check the credibility of resources 
  2. Check the date on publications and use up-to-date information
  3. Avoid duplicating desk research by checking what has been done already

Step 3: Use the right tools and resources 

There are many resources available for desk research and you must choose the right tools for your project. 

Here are some reliable sources that we recommend using for secondary research:

  • JSTOR: This is a great resource to find research papers. Any article published before 1924 in the United States is available for free on JSTOR and the digital library also offers scholarships for independent researchers. 
  • Google Scholar: This is the most popular and easy-to-use search engine that can present scholarly pieces of writing on any topic you require. Google Scholar is free to use, and you can search for any type of publishing format. 
  • ChatGPT: This is a large language model (LLM), a machine-learning system that autonomously learns from data. 

There are also lots of great tools that you can use for competitive analyses, including:

  • Crunchbase: This is a live company database which updates constantly. This tool helps you identify upcoming marketing tendencies. 
  • Capterra: This is an intermediary between buyers and technology vendors within the software industry. Here, you can find the most comprehensive lists of products per industry, reviews, ratings, and infographics, and easily compare competitors. 
  • Serpstat: This is one of the top-rated SEO tools that will help you outline competitor analysis simply by entering your domain.

Step 4: Conduct user testing 

Desk research is a fast and affordable research method but it should be combined with qualitative user research to get the best results. Once you’ve completed your desk research, you can begin talking with real users and testing your products. 

User testing is a crucial part of the product design process and it is much more than simply having a functional product. It’s about maximising everyone’s return on investment and elevating the design to ensure the end product will achieve the desired goals and objectives. 

There are two types of usability testing: 

  • Quantitative testing: This focuses on the usability of a design and assesses users’ performance on a given task, such as completion rates or task times. Quantitative data is usually sourced from questionnaires, surveys, or A/B Testing
  • Qualitative testing: This focuses on the user’s emotions and identifies which design features are easy or hard to use. Qualitative data is usually sourced from interviews and user observations. 

Why user testing is important

Let’s look at an example of why user testing should be an essential part of product development…

In 1990, the well-known beer brewing company Coors decided to tap into the booming bottled-water market by introducing Rocky Mountain Sparkling Water. 

Coors kept its easily recognisable logo at the front and centre of the label. This confused customers, leaving many worried that the new beverage may contain alcohol. 

If Coors had carried out user testing, they would have discovered that the Coors name did not help sell the new product. In fact, it confused and even frightened customers. 

Step 5: Prepare a post-research report 

Documentation is essential to all areas of research, and you should start documenting right from the beginning of the process. Create a detailed research report of all desk research and user research you find. 

You can then share your research findings in the form of a presentation for your team and stakeholders.  

Final thoughts 

Desk research is an easy and cost-effective form of market research that should be the starting point of every product design project. Your desk research will guide your project, leading to effective user testing and ensuring continuous research throughout the design process. 

We hope this article has provided you with useful information about desk research and how to implement it in your next product development project. 

Introduction

As a UX/UI designer, you are well aware that devising creative design concepts and producing high-quality designs require a great deal of time and effort. Fortunately, with the most recent progressions in artificial intelligence (AI) and natural language processing (NLP), you can now streamline the design workflow with ChatGPT. 

In this article, we will look into how ChatGPT can help optimize your design process and give advice on how to begin.

The Benefits of ChatGPT for Designers

ChatGPT is a technology that combines Artificial Intelligence and Natural Language Processing to create answers that imitate human responses. There are many advantages of using this tool, including the ability to come up with new design concepts, build prototypes, and evaluate existing designs. Utilizing ChatGPT can save time, boost creativity, and produce more successful designs.

Examples of ChatGPT in Action

ChatGPT can be used in design sprints and with specific design tools, such as User Personas, Customer Journey Maps (CJMs), Empathy Mapping, and Jobs-to-be-Done (JTBD) frameworks.

Design Sprints:

During the empathy phase of a design sprint, ChatGPT can generate a list of questions to ask potential users to better understand their needs and pain points. During the ideation phase, ChatGPT can generate ideas for possible solutions to the problem.

User Personas:

ChatGPT can generate user personas based on various factors such as demographic data, behavior patterns, and pain points. These personas help designers better understand their users and design products that meet their needs.

Customer Journey Maps (CJMs):

ChatGPT can generate CJMs based on data about the user’s behavior and interactions with the product or service. Designers can use the generated CJMs to identify pain points in the user journey and improve the overall user experience.

Empathy Mapping:

ChatGPT can generate prompts for empathy mapping exercises, such as “What does the user see?” or “What does the user hear?” These prompts help designers to gather information about their users and better understand their needs.

Jobs-to-be-Done (JTBD):

ChatGPT can generate prompts for JTBD exercises, such as “What problem does the user need to solve?” or “What is the user trying to achieve?” These prompts help designers to understand the context in which users are using the product or service, and design solutions that meet their needs.

Tips for Using ChatGPT Effectively

Tips for Using ChatGPT Effectively

To make the most of ChatGPT, designers must pick the right initiating questions, refine the results, and avoid typical errors. Some tips for getting the most out of ChatGPT are to select the suitable setting for your initiating queries, modify the length of the output, and check the accuracy of the generated text.

Conclusion

ChatGPT represents a creative solution for designers to optimize their workflow and come up with more effective designs. This technology can be used to save time, create innovative concepts, and evaluate their designs. 

This article has provided readers with useful information on how ChatGPT can be of assistance to UX/UI designers, and we urge designers to experiment with this technology in their design processes.